Styles: Reusable Formatting
What are Styles?
By now, you should know that in the Item Info panel you can set all the basic characteristics of an item, including characteristics such as the font, font size, text color, background color, and so on. And in the value of a rich text item of a specific card, you can override the characteristics set in Item Info by adding rich text markup directives.Learn more about Setting Item Characteristics.
Tell me more about using Styles in the Content Editor. Tell me more about Rich Text Markup Syntax
But these methods apply either to single items (when using Item Info) or to individual cards (when using Rich Text Markup). Sometimes you may want multiple items to have a common appearance. This can be annoying when you decide to change that common appearance, because you have to edit each affected item and, in the case of Rich Text Markup, each affected card. That's time-consuming and error-prone.
The Styles feature is meant to solve these problems. A style is a named set of item characteristics (called attributes). You create new styles, give them names, and select the attributes they will have by using the Styles tab in Multideck.
Once you've created a style, you can apply it to multiple items on your cards. Those items will all use the settings of the style instead of those in Item Info, so they can all share the same format. Later on, if you want to change all those items (say, by changing the font) you don't have to touch the items; you can just change the style. All the items that use that style will then automatically use the new font that you selected.
The rest of this page describes the Styles feature in detail.
On This Page
Creating and Naming a StyleAdding and Editing Style Attributes
Applying a Style in Item Info
Styles by Reference
Styles Don't Affect Everything
Advanced Uses
Copying and Pasting Styles
Creating and Naming a Style
Open the Styles panel in your Multideck document by clicking on the Styles tab. You will see this display:
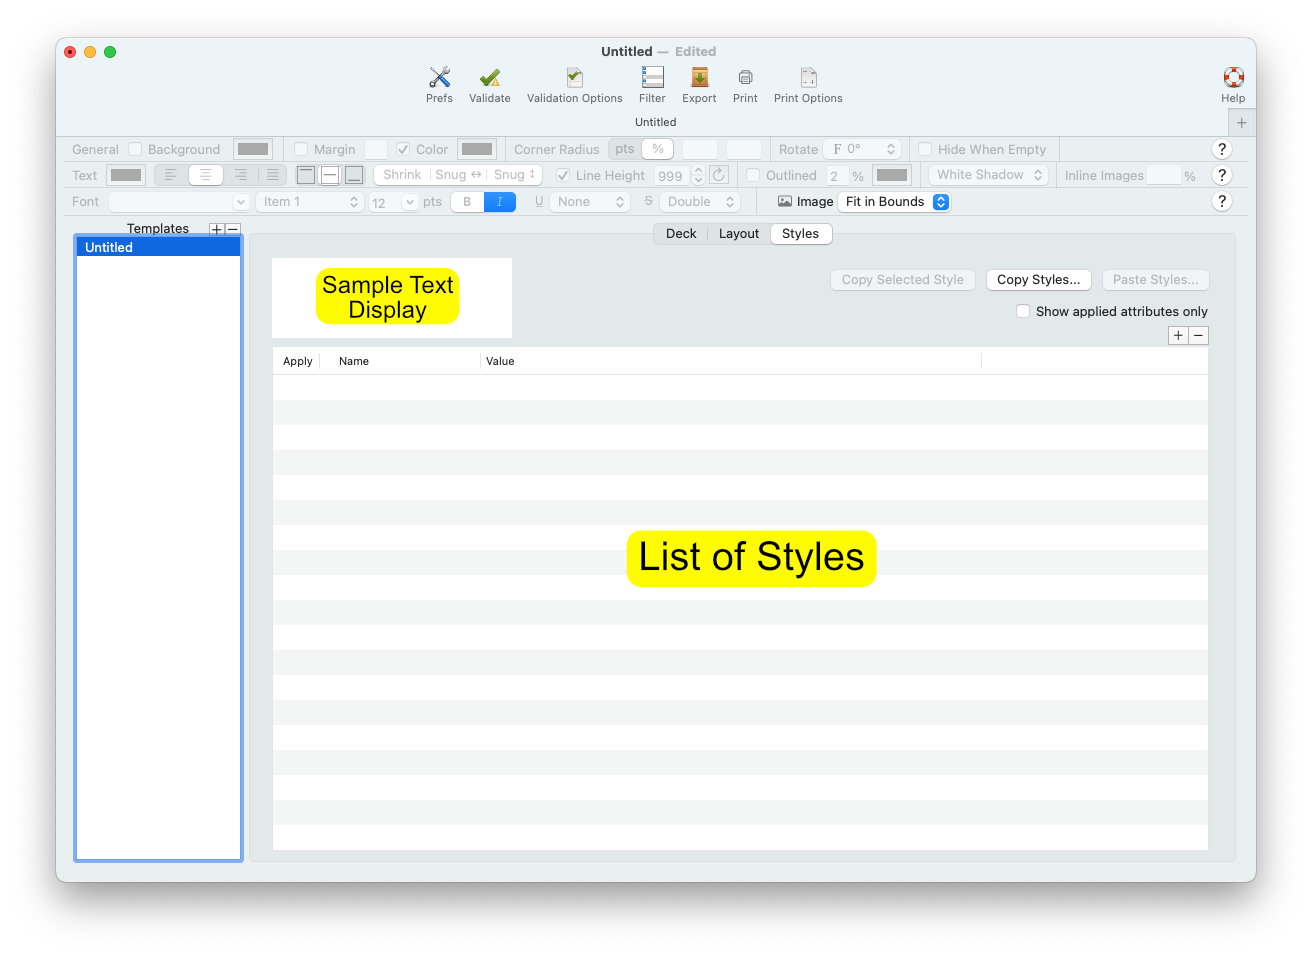
The Styles tab, when no styles have been created yet.
Create a new style by clicking the + button at the upper-right of the list area. A new style will appear in the list, named "Untitled_Style".
The name will selected and ready for you to edit it to give the style a proper name. Style names may contain only alphanumeric characters, dash, and underscore. Press Return or Enter when you are done editing the name. (In our example here, we will name the new style "Hearts".)
You can now see two samples of how a text item might look with this style applied. One appears in the list, in the "Value" column on the same row as the "Untitled_Style" label. The other appears in the large Sample Text Display above the list.
Right now, the samples aren't very interesting because we haven't added any attributes to the new style.
Adding and Editing Style Attributes
To the left of the style's title in the list, you can see a disclosure triangle. Click the triangle to open the style. You should now see this:
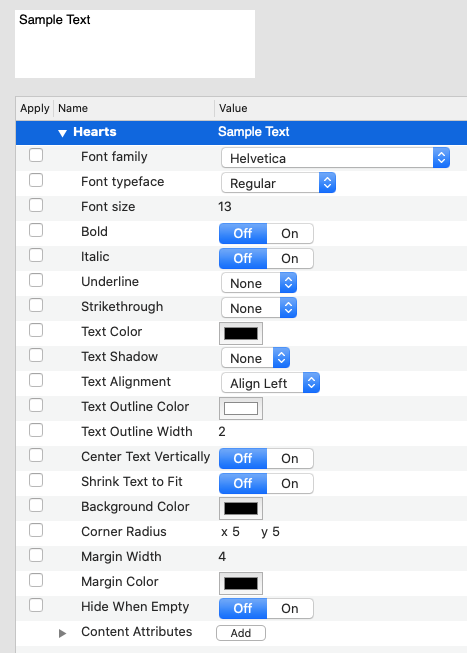
A brand-new style, open for editing.
The rows below the title row show all of the attributes that the style can have. Currently, none of those attributes are applied. You can tell because none of the checkboxes in the Apply column are selected. An attribute that is not applied will have no effect on any items. Since no attributes are applied here, this is currently a useless style.
Let's apply and set some attributes. Since this is a "Hearts" style, a bold, plain font like the ones on a deck of poker cards would be appropriate. Click the popup menu button labeled "Font Family" to see a list of available fonts, and select the one named Arial. The "Apply" checkbox for the Font Family attribute will automatically be selected (it will now show a checkmark). Also, the sample text displays will switch to show the new font.
We wanted a bold font, so now click the Off/On switch labeled "Bold". The sample text will now show in bold face.
The font size looks too small, so now click in the Value column of the Fontsize row, until the "13" is selected for editing. Enter 24 for the new font size, and press Return or Enter when you are done. The sample text will update to show the new font size. (The sample on the "Hearts" title row is not shown at the new larger size, because it is too tall for the line. But you can see the full font size in the upper display.)
Finally, let's make sure that the text is a proper red in color. Click the color well (the box currently showing a black rectangle) on the "Text Color" row. The Color Picker will open. Select a nice dark red, and see the text in the samples turn red to match.
Here's what it looks like now:
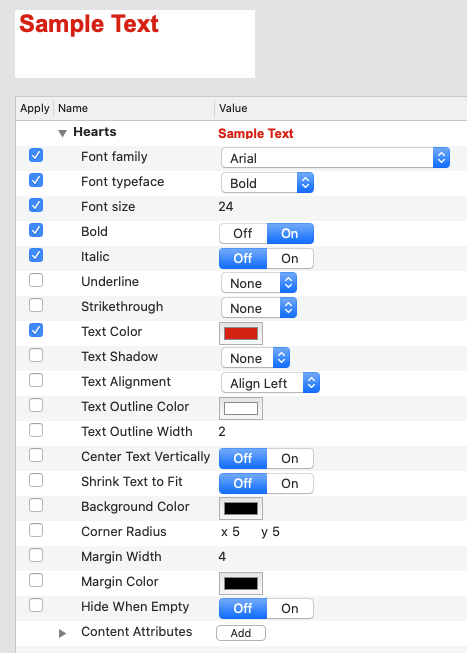
A style with some attributes applied and edited.
You'll notice that the Font Typeface has also changed and been applied, and that the Italic option is also applied. Read on to learn how the Italic and Bold options interact with the Font Typeface.
About Font Management
Fonts can be a bit more complex than they may appear. This section discusses the details as they apply to the Styles controls.
Families and Typefaces
In the example above,
we selected "Arial" from the Font Family popup menu.
It's called a "font family" because Arial actually includes
four different but related fonts,
called "Regular", "Italic", "Bold", and "Bold Italic".
These variants are called "typefaces",
and you can see all of Arial's typefaces
by clicking the Font Typeface popup menu.
When you specify that you want a font to be italic or bold, what actually happens is that a different font from that font family is selected: one that has the characteristics you've requested. In the example above, when you turned on the Bold option, Multideck found the specific member of the Arial font family that is bold, and made that the actual font for this style. To show that, the Font Typeface popup now displays "Bold" as the typeface.
You could have gotten the exact same effect by selecting "Bold" from the Font Typeface popup menu, instead of using the Bold switch. For a font family like Arial, it doesn't matter which way you do it.
Font Attributes are Entwined
The Font Family, Font Typeface,
Bold, and Italic attributes are "entwined",
meaning that changes to any one of them
may automatically force changes to one or all of the others.
For example, applying Font Typeface
automatically also applies Font Family
because you cannot use a typeface
without also using its font family.
Similarly, choosing a Font Typeface
may cause changes to the Bold and Italic switches,
which will always match your selected and applied typeface.
Changing the value of Bold or Italic
will force a change in the selected typeface
if Font Typeface is applied, and so on.
Some Font Families are weird
While the Arial font family includes members
that are italic, bold, and bold-italic as well as "regular",
not all font families do.
For example, some font families may not have italic or bold versions.
Others may only have italic or bold versions.
When you select a font family
that is always or never italic or bold,
the italic and bold switches will be disabled.
Furthermore, some font families contain more than just italic and bold variants. For example, the font family Myriad Pro contains ten members, with names like Bold and SemiBold as well as Regular, allowing you to choose from several different weights (degrees of boldness). If you are using such a font, we recommend that you select the specific typeface you want from the Font Typeface popup menu, rather than relying on the Bold and Italic switches.
Bold and Italic can be used without Font Family and Typeface
You may apply
the Bold and Italic switches without applying a
Font Family or Font Typeface.
When you do this, the Bold and Italic
attributes are applied (if possible)
to the item's own font.
If an item's font doesn't support
bold or italic,
the Validation command will issue a warning
that you've made a font request
that can't be honored.
Applying a Style in Item Info
Now that you've created a style, you can apply it to items in your card layout to give them a similar appearance. Let's say we're trying to duplicate a standard poker deck. Our layout will have a "Rank" item in the upper-left corner, and a "Suit" item next to it. We want the card to be readable when rotated, so we'll duplicate those two fields, rotate them 180°, and put the duplicates in the lower-right corner.To make them all share the same appearance, select each one in your card layout, and use the Style popup menu in the Item Info area:

The Style popup menu button, in the Item Info area.
Initially, "No Style" is selected, meaning that no style will be applied to the item. Click the popup button, and select the "Hearts" style that you created earlier:

Selecting the "Hearts" style in the popup menu.
Now the item will automatically have the characteristics that you set for the Hearts style, even if you choose other values for those characteristics using other Item Info controls.
Here's what it might look like:
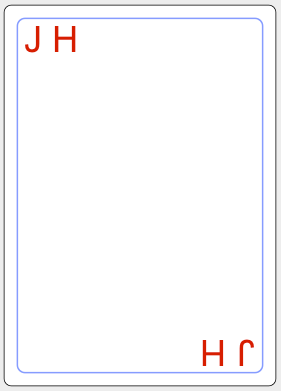
Four items, all using the "Hearts" style.
Now suppose you later decide that the font size isn't correct, or you want a different shade of red. Instead of making the change individually in every one of those items, just go back to the Styles tab and edit the Style. All the items that use the style will automatically get the change.
Styles by Reference
In the example above, we were trying to create a standard poker deck. You may have noticed a problem: if the Rank and Suit items both specify the Hearts style in the popup menu, there's no way to have cards for Spades, Diamonds, or Clubs.To solve this problem, Multideck allows the style of an item to depend on the value of a different column in your content. For example, you could add a column to your content called "SuitStyle". In that column, you would enter the name of one of your defined styles, such as Hearts. Each card could have a different style listed in that column, so you would have 13 cards that specify Hearts in the SuitStyle column, 13 that specify Spades, and so on. (Of course, you must also actually create the styles for Spades, Diamonds, and Clubs.)
To apply a style listed in a different column, use the Style popup menu. You will see that the menu not only contains the names of all of your defined styles, it also lists the names of all of the columns in your content. The column names are shown with a prefix of two dots (so that you would see your SuitStyle column listed as ..SuitStyle). The two dots tell you that it's a column name, and they are consistent with the syntax used in Rich Text Markup for including the value of a different column.
To make the style of the current item depend on the style whose name is listed in the SuitStyle column, select ..SuitStyle from the Style popup menu. (See Embedded References to Other Fields).
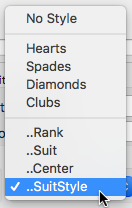
Selecting the "SuitStyle" column reference in the popup menu.
Styles Don't Affect Everything
The "Hearts" style that we created specifies ("applies") a font, font size, text color, and the "Bold" attribute. It doesn't apply the remaining attributes, including Italic, Underline, Text Alignment, and others. So we are still free to set those attributes in Item Info, and they can still be set differently for each item; the Hearts style won't affect them.Advanced Uses
You've probably thought of a couple of problems with our example use of Styles for a poker deck. The first is obvious: you want a Heart icon instead of a red H. The next section will discuss how to add an image to a style by using Content Attributes.Learn about Content Attributes.
Copying and Pasting Styles
Copy styles by using the Edit > Copy Styles menu command, or by using the Copy Selected Style or Copy Styles... buttons in the Styles tab.
If your game includes more than one deck and requires more than one Multideck document, you might want to use the same styles in several or all of those documents. Styles can be copied from one document and pasted into others, so that you don't have to re-create the same styles by hand in each document.
Paste styles by using the Edit > Paste menu command while the Styles tab is selected, or by using the Paste Styles button in the Styles tab.
If your document already has a style with the same name as one that you are pasting, the newly-pasted style will be given a slightly different name. The existing style will not be affected, and you will be notified that this has happened.